Christmas Ornament 3D Layered Cut File – Creative Possibilities for Home and Gifting
For those who love the holidays and enjoy crafting, the Christmas Ornament 3D Layered Cut File is a game-changer. This design offers a unique way to create stunning, dimensional ornaments that can be used in a variety of real-world applications—from festive home decor to thoughtful handmade gifts. With multiple layers included, it allows for customization, flexibility, and a professional finish without requiring advanced skills.
What Is a Christmas Ornament 3D Layered Cut File?
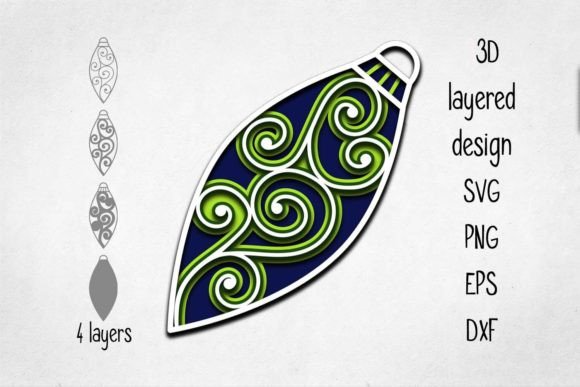
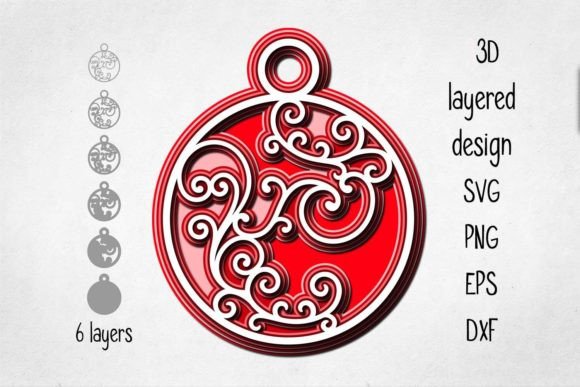
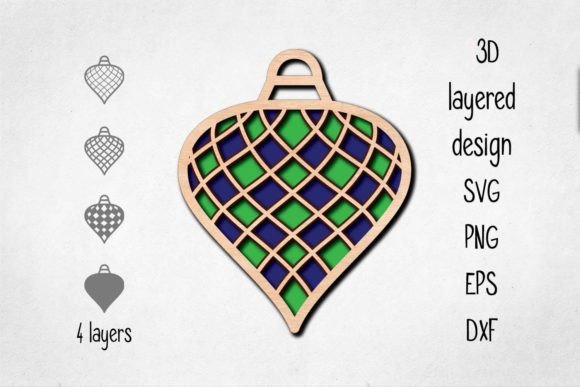
A Christmas ornament 3D layered cut file is a digital design that consists of several interconnected or stacked layers. Each layer represents a part of the ornament’s structure, such as the base, middle details, and top elements. These layers are typically formatted in common cutting machine-compatible files like SVG, DXF, EPS, and PNG, making them easy to use with tools like Cricut, Silhouette, laser cutters, or CNC machines.
The beauty of this type of file lies in its versatility. You’re not limited to using all the layers—depending on your project needs, you might only need two or three. Plus, you can choose any color scheme, material, or size (within reason), giving you full creative control over the final product.
Home Decor Projects
If you're looking to spruce up your holiday decorations, the Christmas Ornament 3D Layered Cut File can be an excellent asset. For instance:
- Wall art: Stack the layers and paint them with metallic or acrylic paints to make eye-catching holiday wall displays.
- Furniture accents: Attach the finished ornament to the back of a chair, cabinet, or mirror using strong adhesive or screws for a personalized touch.
- Tree toppers: Customize the design to be extra large and use lightweight materials to create a one-of-a-kind tree topper.
These projects aren't just about aesthetics—they add personality and warmth to any space. And because the design is scalable, you can match the ornament’s size to the room or furniture piece you’re decorating.
Gifts for Friends and Family
Making custom gifts during the holidays has never been easier. Whether you're creating something for a friend, family member, or coworker, the layered design opens up many possibilities:
- Wooden keepsakes: Laser-cut the layers from wood and assemble them into a durable ornament that can last for years.
- Personalized photo frames: Attach a printed photo behind the layers to create a framed 3D ornament that tells a story or commemorates a memory.
- Mini sculptures: Use plastic or MDF to build small, stackable versions of the ornament that fit nicely in a gift box or on a keychain.
Each of these options allows you to tailor the ornament to the recipient's style or interests. For example, painting the layers in pastel tones could suit a modern aesthetic, while bold reds and greens might appeal to someone who loves traditional holiday themes.
Commercial Applications
Crafters and small business owners can also benefit from the Christmas Ornament 3D Layered Cut File. Here’s how:
- Custom ornament shops: Offer clients the option to personalize their own layered ornament by choosing colors, materials, or adding text/initials.
- Boutique items: Create high-end, handcrafted ornaments for resale at local markets or online stores. The layered effect gives them a premium look.
- Corporate gifts: Businesses often seek unique yet affordable holiday gifts for employees or clients. A 3D layered ornament made from sleek materials like acrylic or metal can fit the bill perfectly.
Using these files commercially can help increase profit margins due to the relatively low cost of materials and the ability to scale production efficiently. Just ensure that your equipment supports the file formats provided—SVG, DXF, EPS, and PNG—and that you understand the legal aspects of reselling if applicable.
Materials and Considerations
One of the best parts about the Christmas Ornament 3D Layered Cut File is the wide range of materials you can use. Common choices include:
- Card stock: Great for quick, decorative prototypes. Ideal for beginners or temporary displays.
- Wood: Offers a natural, rustic charm. Perfect for long-lasting ornaments or those intended for hanging.
- Plywood or MDF: Provides stability and ease of painting. Best suited for larger designs or heavier structures.
- Plastic or acrylic: Adds a modern, glossy finish. Can be transparent or colored for different visual effects.
Before selecting your material, consider the purpose of the ornament. If you're planning to hang it on a tree, weight and durability matter more than they do for a tabletop display. Also, keep in mind that some materials may require additional preparation—like sanding or priming—before assembly or decoration.
Resizing Tips and Limitations
The design is originally sized to be over 8 inches (20 cm) at its widest point, but you can resize it to better fit your project. However, there are some important limitations to consider when doing so:
- Thin elements: When reducing the size, delicate parts of the design might become too fragile or difficult to cut accurately. This can affect both the appearance and structural integrity of the ornament.
- Machine compatibility: Some cutting machines struggle with very fine lines or intricate shapes once scaled down. Always test your resizing on a smaller batch before committing to a full set.
- Material thickness: Thinner materials may not support the same level of detail as thicker ones when scaled down. Choose accordingly based on your desired outcome.
To avoid issues, start by experimenting with a few layers and a reduced size. Once you confirm the cuts work well and the pieces hold together, you can proceed confidently with the full design.
Assembly and Customization Ideas
Once you've cut the layers, the next step is assembling them. Here are a few tips to enhance your process:
- Use double-sided foam tape between each layer to give the ornament depth and a polished look.
- Paint creatively: Try gradient techniques, metallic finishes, or even glitter for a festive flair. Acrylic paints work well on most surfaces.
- Add lights or LEDs: Insert small LED strips between layers for a glowing effect, especially useful for centerpieces or window displays.
- Incorporate textures: Sand, carve, or emboss the layers to add tactile interest and uniqueness.
For added personalization, consider engraving names or dates onto the layers before painting. Or, use the design as a template for cookie cutters, fabric appliques, or other cross-medium crafts.
Who Can Benefit Most from This Design?
While the Christmas Ornament 3D Layered Cut File is accessible to many, certain groups will find it particularly valuable:
- Hobbyists and DIY enthusiasts: Those who enjoy experimenting with new materials and techniques will appreciate the adaptability of this design.
- Teachers and school craft programs: It's an engaging project for students to learn about layering, scaling, and finishing techniques in a fun holiday context.
- Event planners: Use the ornaments as part of themed decorations for holiday parties, weddings, or seasonal events.
- Interior designers: Incorporate the design into client spaces for a bespoke holiday touch that aligns with their existing décor.
Each user group can approach the design differently. What matters most is understanding how the layers interact and what kind of impact you want the final piece to have.
File Formats and Compatibility
When you purchase the Christmas Ornament 3D Layered Cut File, you’ll receive a ZIP folder containing four file types: SVG, PNG (transparent background, 300 dpi), EPS, and DXF. These formats serve different purposes:
- SVG: Best for most cutting machines like Cricut or Silhouette. Easy to edit and manipulate within design software.
- EPS: Preferred for vector-based editing and printing. Offers scalability without losing quality.
- DXF: Ideal for laser or CNC machines. Supports precise measurements and complex geometries.
- PNG: Useful for visual previews, digital mockups, or print-to-cut processes. The transparent background ensures accurate placement.
Always verify that your machine or software supports these formats. If you're unsure, consult your device manual or reach out to the manufacturer. Having access to multiple file types makes it easier to switch between platforms depending on your workflow and tools.
Why Go 3D? The Advantages
Compared to flat, single-layer designs, 3D layered ornaments offer several advantages:
- Visual depth: The layered structure adds dimension, making the ornament stand out against a plain surface or tree.
- Customization potential: By combining colors, materials, and layers, you can create countless variations from the same base file.
- Unique presentation: People love receiving handmade items that feel special and crafted with care. A 3D ornament can be that standout gift.
- Reusability: Unlike paper snowflakes or glued-on decorations, properly made 3D layered ornaments can be disassembled and reused year after year.
These benefits make the design ideal for anyone who wants to elevate their holiday projects with minimal effort and maximum impact.
Challenges to Be Aware Of
Despite its flexibility, the Christmas Ornament 3D Layered Cut File does come with a few challenges:
- Time investment: Assembling multiple layers takes longer than working with a flat design. Factor in extra time for painting, drying, and attaching components.
- Cost of materials: Depending on the material chosen, costs can vary. Plywood or acrylic sheets might be more expensive than cardstock or felt.
- Storage requirements: Finished 3D ornaments take up more space than flat ones. Make sure you have proper storage solutions if you plan to keep them for future use.
Still, these drawbacks are easily manageable with careful planning and organization. Many crafters find the end result worth the extra effort.
Putting It All Together
Whether you're crafting for yourself, your home, or others, the Christmas Ornament 3D Layered Cut File provides a solid foundation for creativity. From educational workshops to boutique retail, this design bridges the gap between simplicity and sophistication. With the right tools and materials, you can bring holiday cheer to life in ways that are both meaningful and memorable.